Downloadable Assets with GitHub Actions
GitHub Actions is (sic!) a great tool to automate the build process of your software projects. Providing a configurable and extensible CI/CD-platform, developers can test, build and deploy their projects by writing a few lines of YAML.
This article demonstrates how to add downloadable assets to a release when using GitHub Actions with a Sencha Ext JS project. The implementation of the actions is — of course — applicable with any other project.
The article assumes you are already familiar with the concept of CI/CD and that you have used GitHub Actions (or any other build tool) before. If not, the two following resources should get you started:
Motivation
A regular build pipeline for creating a release with GitHub Actions looks like this:
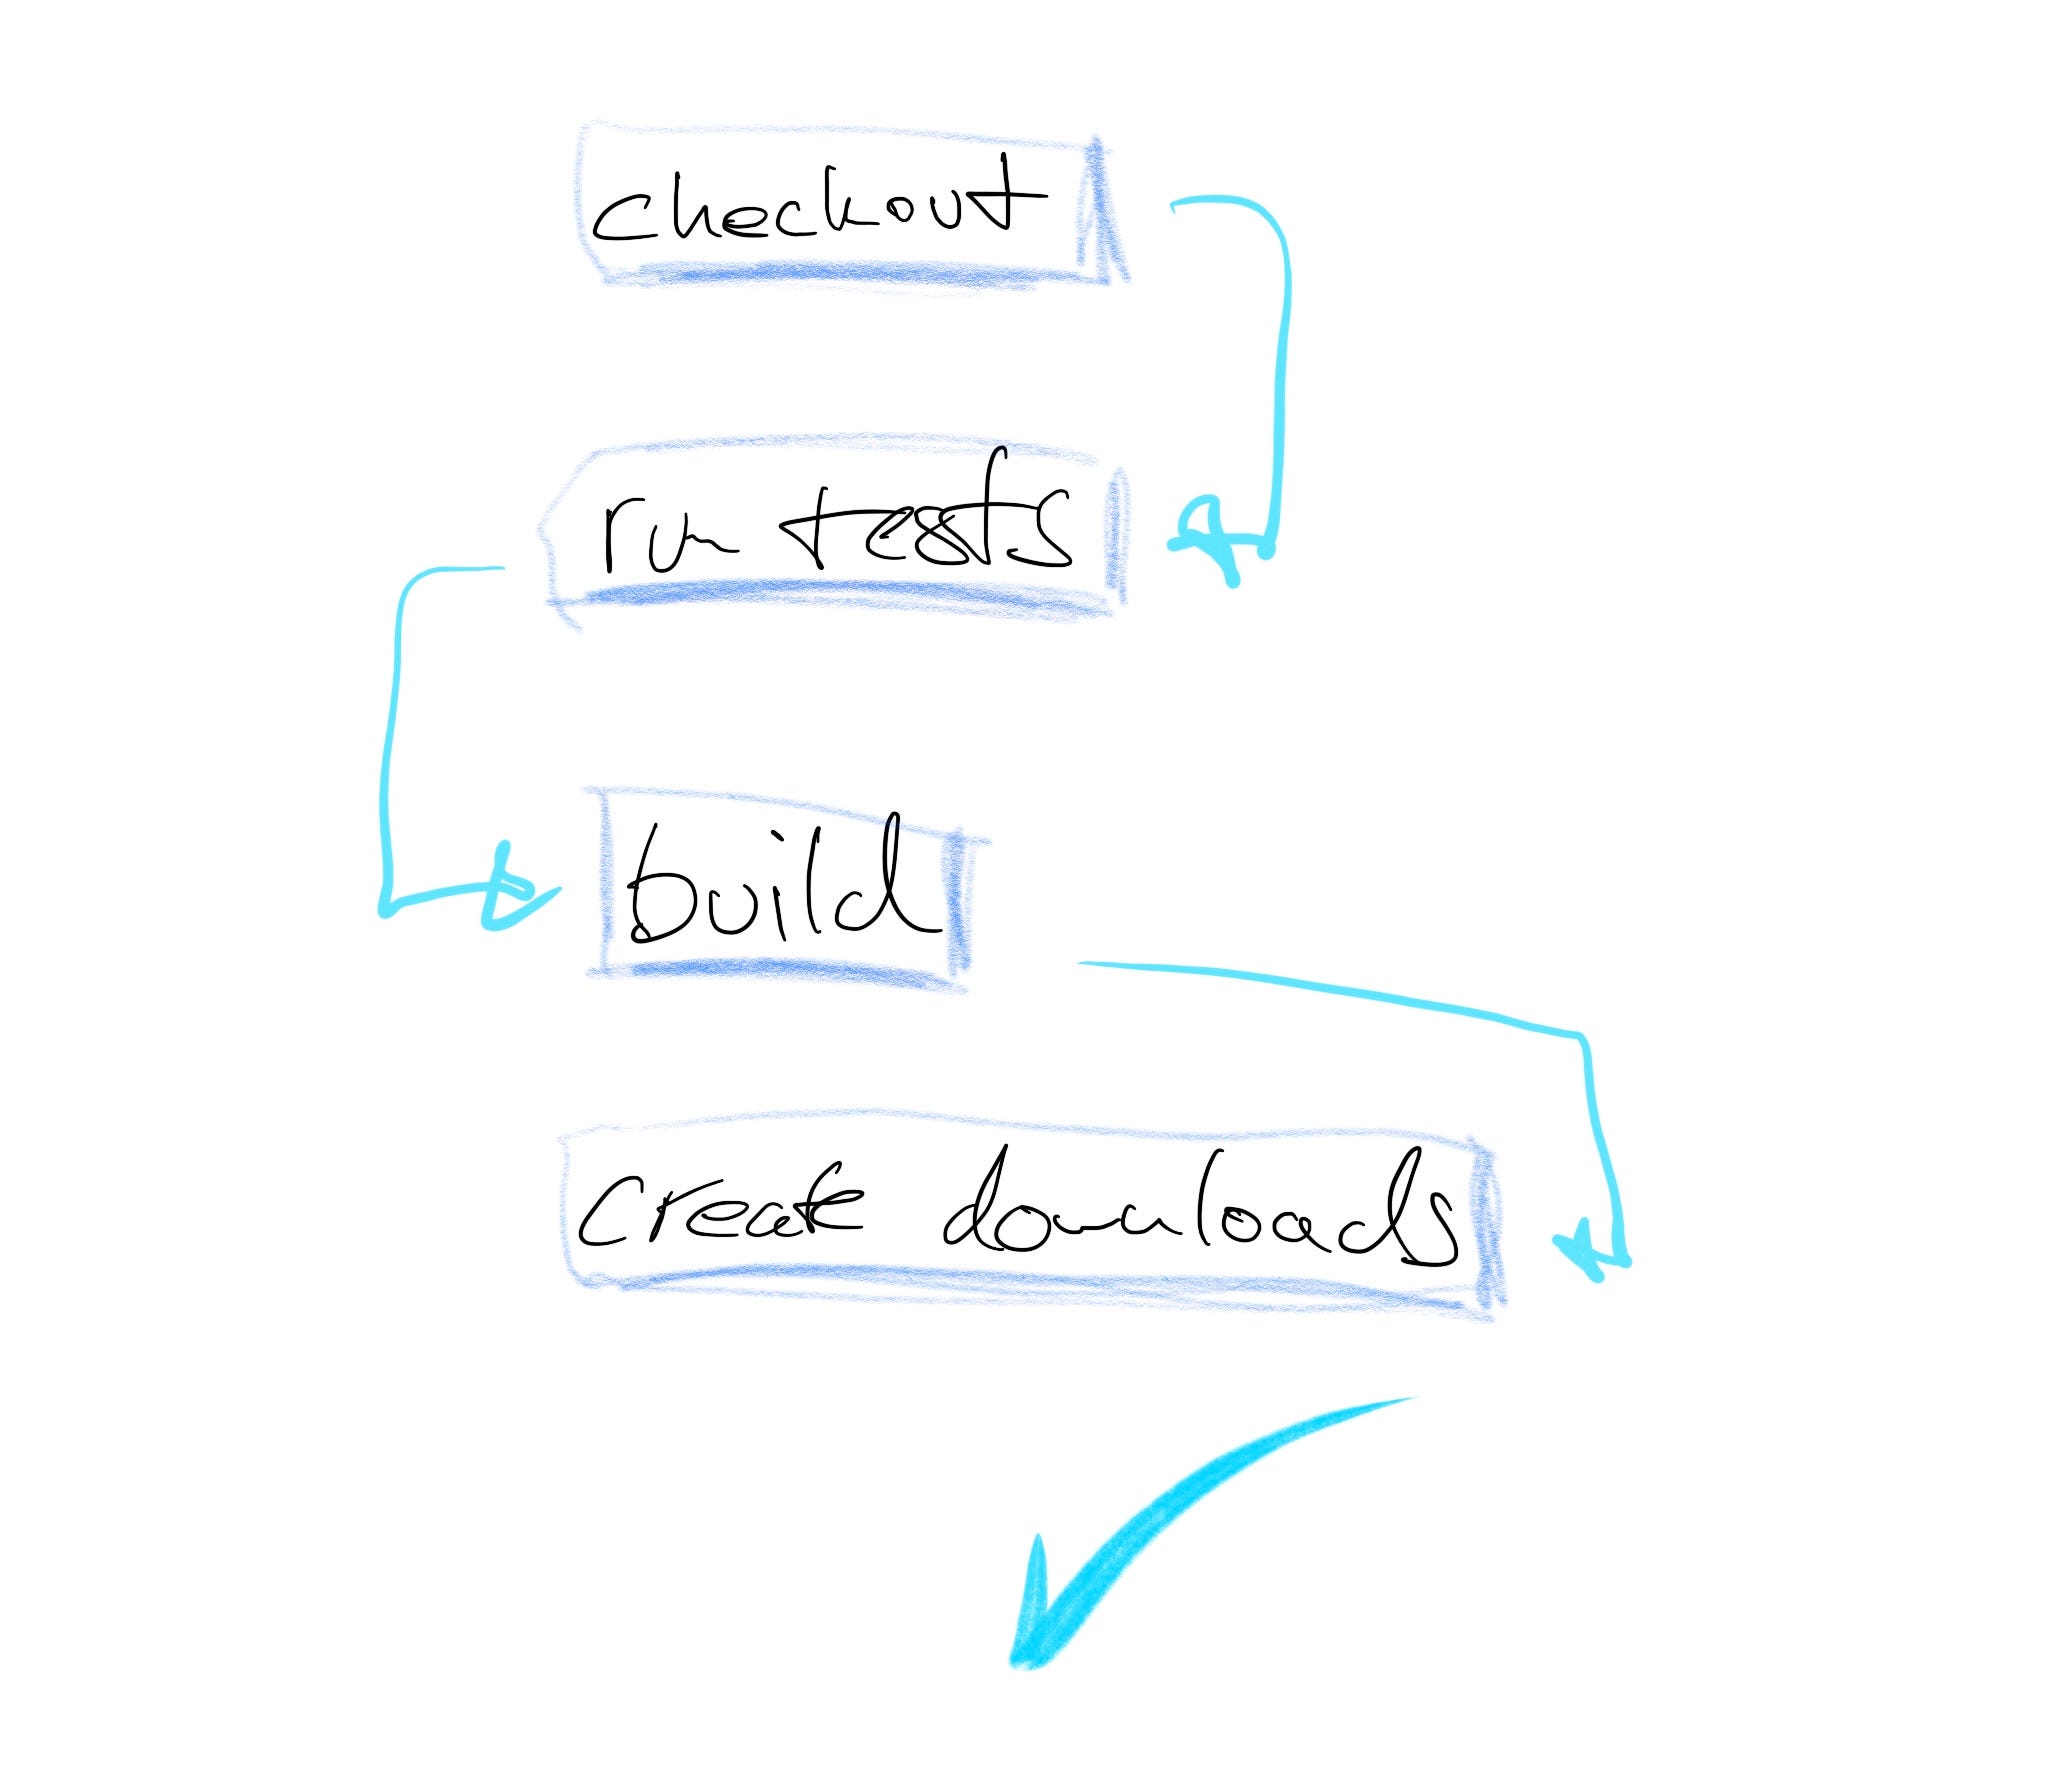
This is a very optimistic approach to a build pipeline as this assumes that each step succeeds. We will also not go into detail of each build step since various sub-tasks might be involved. However, when working with Sencha Ext JS projects (or any other project available via NPM), we can unfold the build pipeline a little bit more:

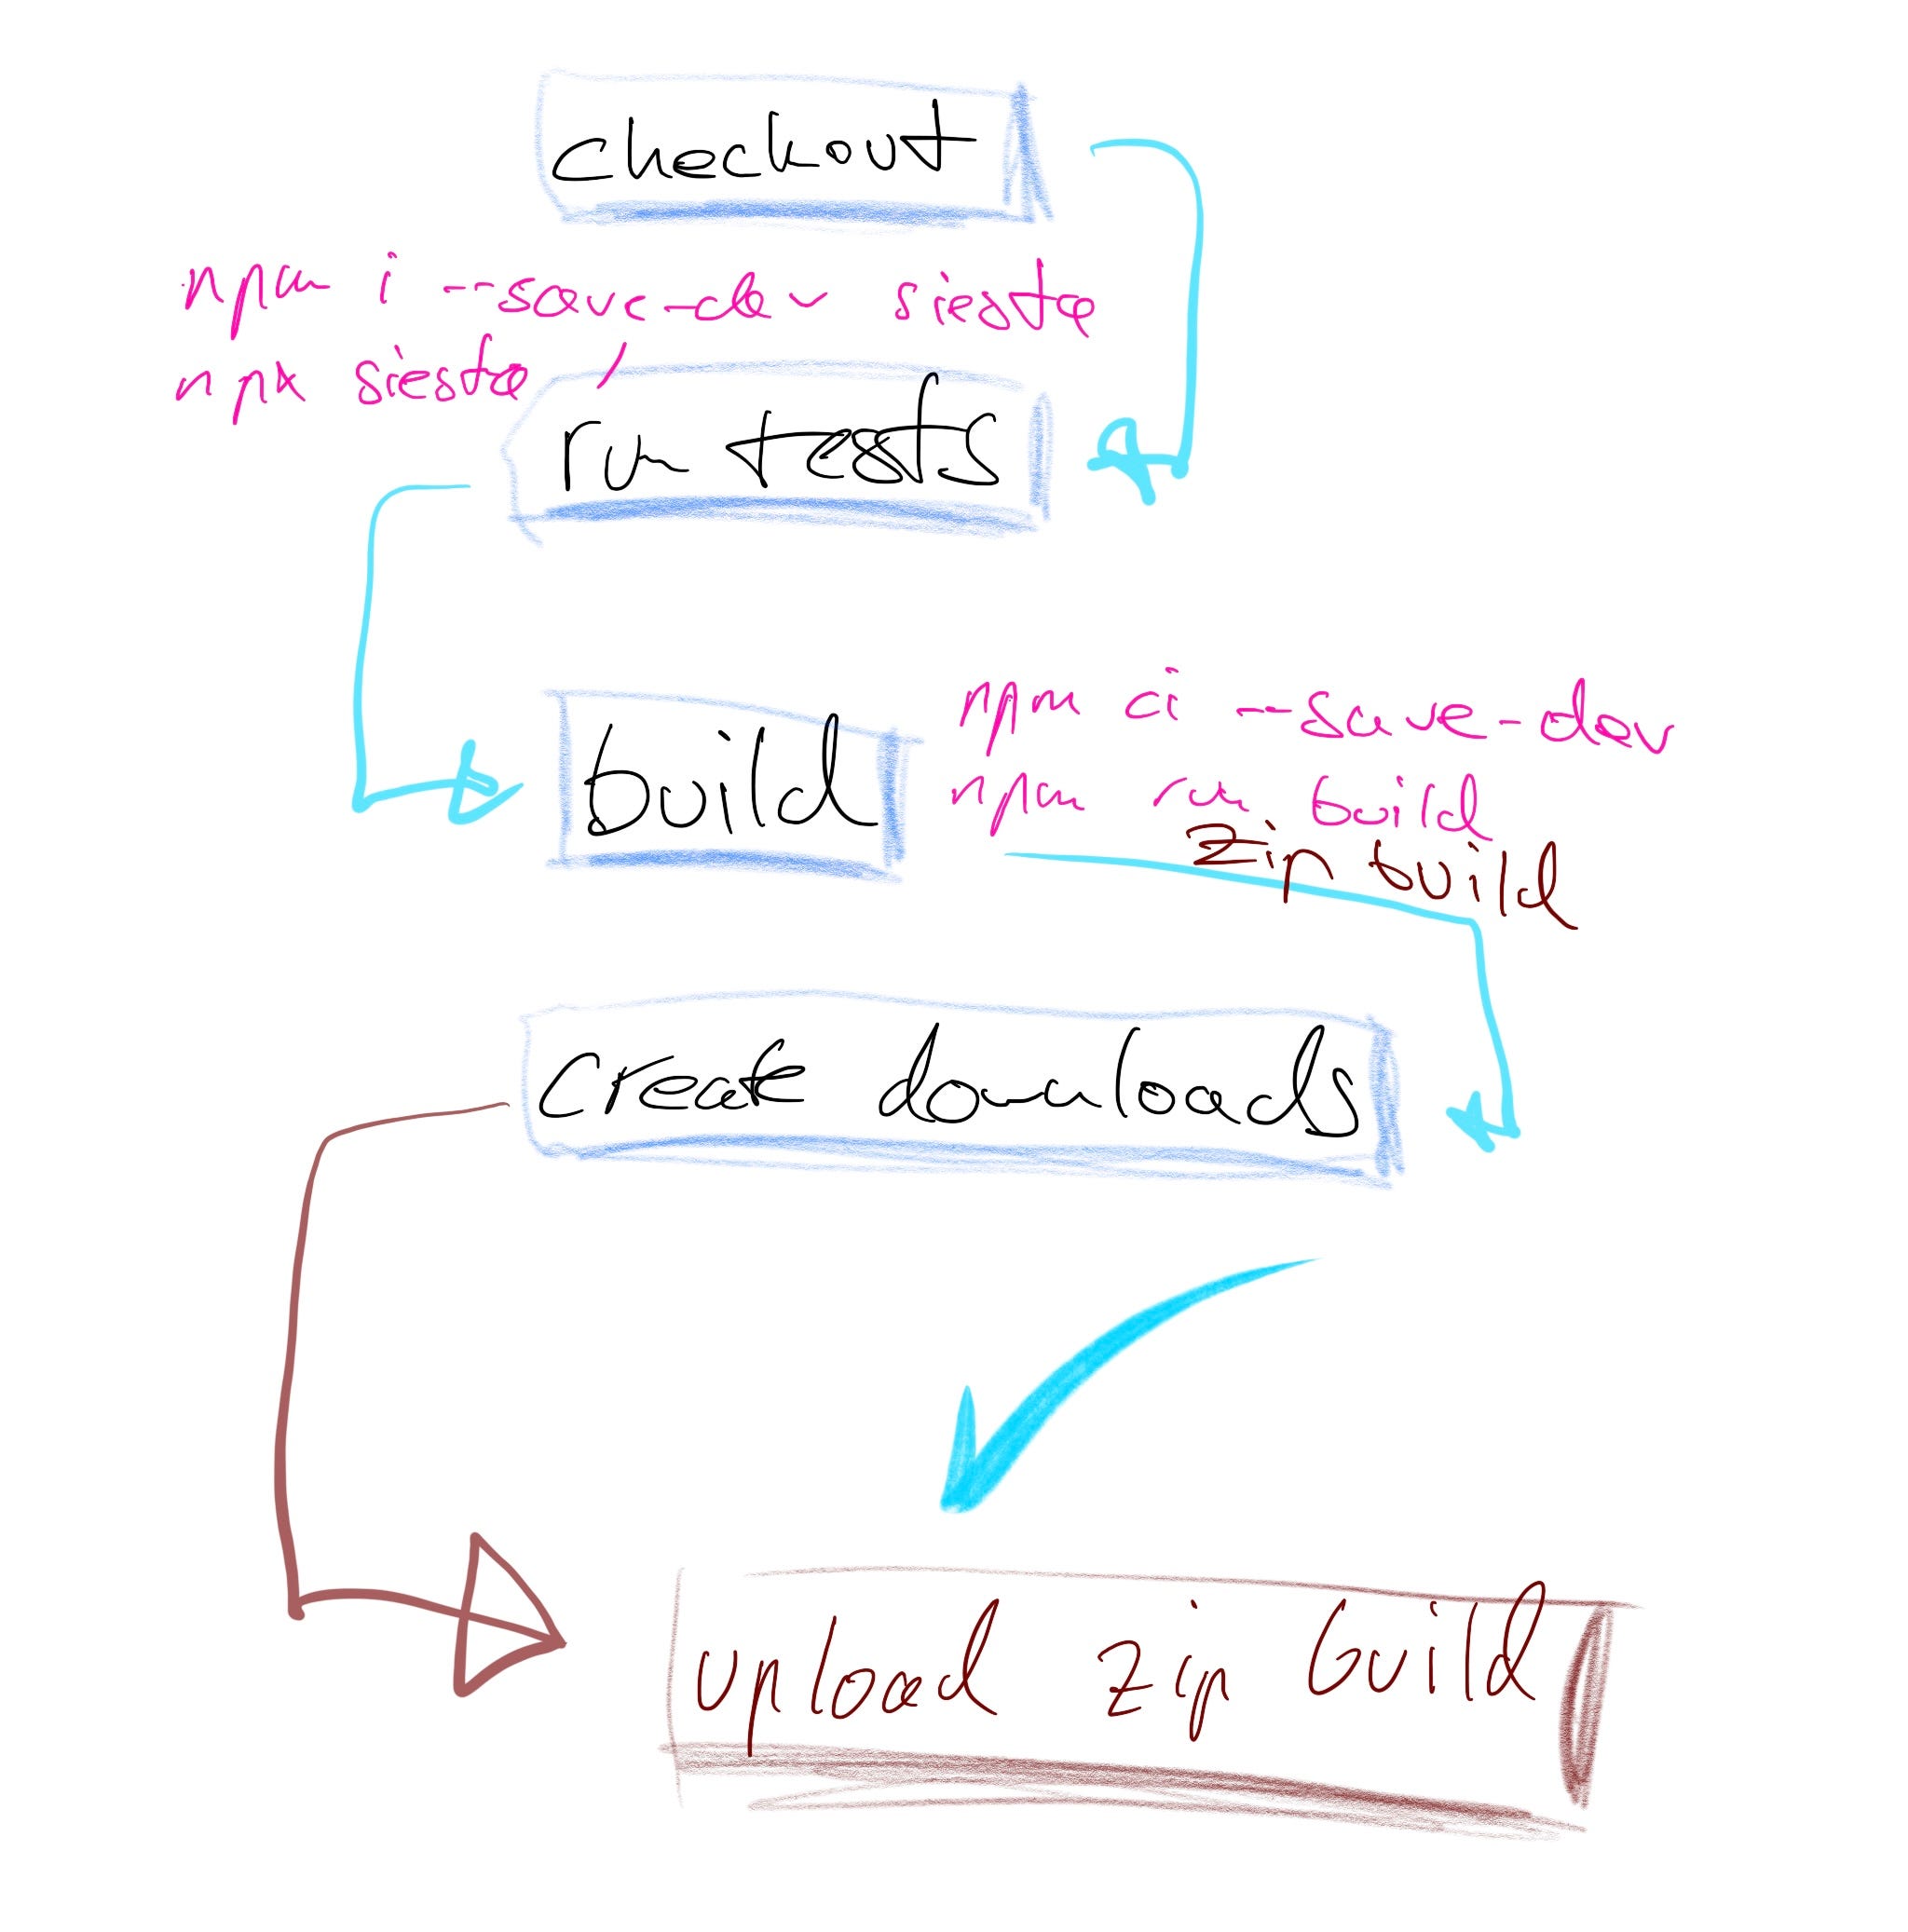
Of interest for us is the part where the downloads are created. actions/create-release@1 usually provides a tar- and a zip-file of the project-files as found in the repository, representing a git-tagged snapshot of the project.
However, we want to also include a build of the NPM project itself. If we only provide the downloads as created by actions/create-release@1, the user would still have to build the project on his own. Our ideal and final build pipeline would look like this:
Basic Build
The basic script for creating a release with GitHub Actions looks like this:
This script is invoked whenever we git push origin v1.2.3 to our repository (“v1.2.3” as a mere example for a version tag given the semver-syntax). workflow_dispatch allows us to run the script manually.
We then define the build-job, consisting of two steps: checkout and create release.
Two pre-defined actions are used here: actions/checkout@v2 and actions/create-release@v1. They should be self explanatory: The first one simply checks out the code of our repository, the second one creates the tar and zip for this checkout and adds them as downloads to the Releases-page of the GitHub repository we’re working with.
Note: At this point, the checkout action is not really necessary, since the create-release action does not depend on it and will work just fine without it. We’ll get back to it shortly.
We’re missing a few more steps — the build and the upload of a deployable build so we can access it as a downloadable asset. Let’s add these steps now.
Intermission: Providing Repository Secrets
The following explains how to provide a repository secret with GitHub for authentication with the Sencha NPM repository. Although the Sencha NPM is used here, the concept is the same for any other private NPM repository where authentication is required during the build process.
Some NPM repositories are private and require a registered user when npm i one of its packages. This is usally done by using the cli command npm adduser/login:
$ npm login — -registry=[registry_url]
… which triggers a sign-in process that allows you to provide a username and a password to sign in at the specified registry. However, our build script does not run in an interactive environment (hence the buzzword “automation”), and that is why we have to provide a secret. A secret — in terms of our CI/CD environment — is simply a variable (a template placeholder would also be a valid description for it) that gets replaced during the build with its actual value — hidden from everyone except for the build system itself. We do not want anyone to be able to read our passwords, do we?
The Sencha NPM-repository is private and requires a registered user for downloading the Ext JS SDK. A registered user is either the owner of a commercial license of the SDK, or a user registered for a 30-days trial version of the framework (more info here). To actually resolve the dependencies for our project during npm ci, we need to provide our Sencha NPM credentials during the automated build process. It must be part of the build script itself, but how do we keep it secret?
It all boils down to the following two commands that have to be executed before npm ciis invoked:
   $ npm config set @sencha:registry [https://npm.sencha.com](https://npm.sencha.com)
   $ npm config set //npm.sencha.com/:_authToken=${{secrets.TOKEN}}
… whereas ${{secrets.TOKEN}} is the authentication token that can be used for authenticating a registered user with the Sencha NPM repository. The variable makes sure that no login credentials (better: the token) is stored as cleartext in the build script. We now have to tell the GitHub Actions where it can find the secret.
Active and valid tokens can be found in the users .npmrc on the user’s machine. The first step would be to locate the .npmrc-file (on Windows, it’s usually store under %HOMEPATH%) and find the authentication token used with the Sencha NPM repository. Copy it to the clipboard.
We now return to our respository over at GitHub.com and navigate to the settings of our repository (that would be the repository for which we’re writing the action).

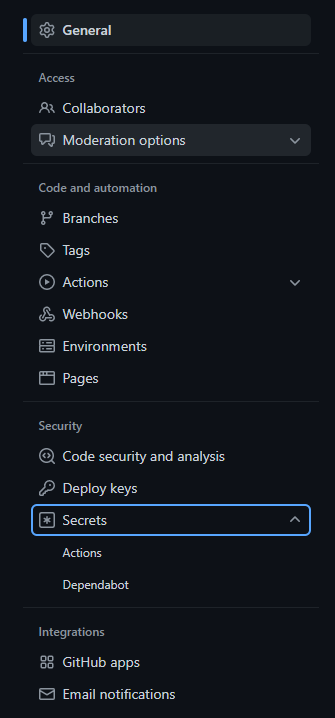
- Once we have clicked the Settings tab and the page content’s have been loaded, we’re presented with a menu on the left side of the screen. Find the entry Secrets from the menu, and activate it so its sub menu gets shown. Then click its entry Actions.
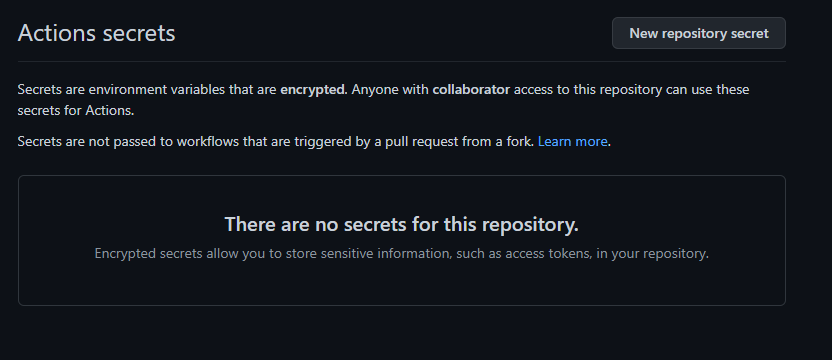
- The right side of the screen will now load any existing secret for updating or removing its value. We choose to add a new secret so we can store the authentication token for the private NPM repository.
- In out build script, we want to refer to the authentication token with the variable
${{secrets.TOKEN}}( since TOKEN is very generic, you’re free to choose any other name).
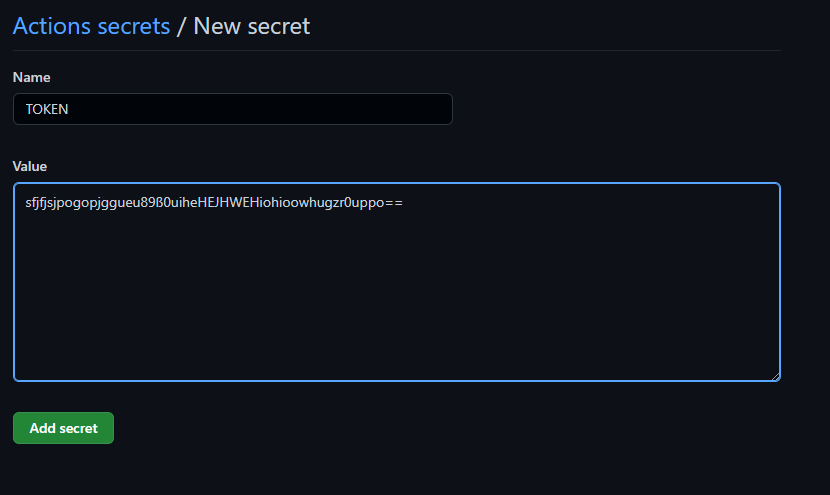
- Click Add secret
Et voila, Settings > Secrets > Actions will now list your recently added secret token. You can now use it for this repository’s build scripts.
Onboarding the Build Software
Finally, let’s add the checkout build step to good use.
If a new developer joins an ongoing software project, he/she has to set up his/her local development environment, clone the repository and build the project. That’s exactly what’s happening now: A new dev joins the tem, if only briefly and in the form of an automated process: Let’s onboard the GitHub Action!
Preparing the build
We require several more actions:
Install Node.js — in order to use npm, our build environment needs of course Node.js. Luckily, there is already actions/setup-node@v2 available, so we simply have to tell our script to use it. With the help of matrix strategies we’re also able to run the build with different versions of Node.js to guarantee (backwards) compability —v16 will do for now
Provide an authentication token for the private NPM repository — as explained in the previous section of this article, https://npm.sencha.com requires a valid user. With the help of Repository Secrets, we’re able to provide this token for the automated build process now
Install dependencies with npm ci — this will make sure all libraries required for our project are installed. Once this process finishes, we can run the actual build script defined for our project
Create a deployable build with npm run build — this is the build script locally available for our project
Create a zip file — pack the files created with npm run build and create a zip-file from it. This will be the asset that gets added to the release in the next step
Here are the additional steps we have just described. The indentation is off for a few lines to remain readability. Also note the path used at the end of this build step: We assume the project build to be bundled in the directory ./build/myproject — of course, you’d have to adjust the path here to make sure the correct files end up in release.zip — which is saved relative to the build-directory at the same location where the script was invoked from.
    steps:
      - uses: actions/checkout@v2
      - name: npm (Node.js ${{ matrix.node-version }})
        uses: actions/setup-node@v2
        with:
          node-version: ${{ matrix.node-version }}
          cache: 'npm'
       - name: npm ci
         run: |
           npm config set @sencha:registry [https://npm.sencha.com/](https://npm.sencha.com/)
         npm config set //npm.sencha.com/:_authToken=${{secrets.TOKEN}}
           npm ci --save-dev
       - name: Build Ext JS & zip build
         run: |
          npm run build
          cd ./build/myproject && zip -r ../../release.zip ./*
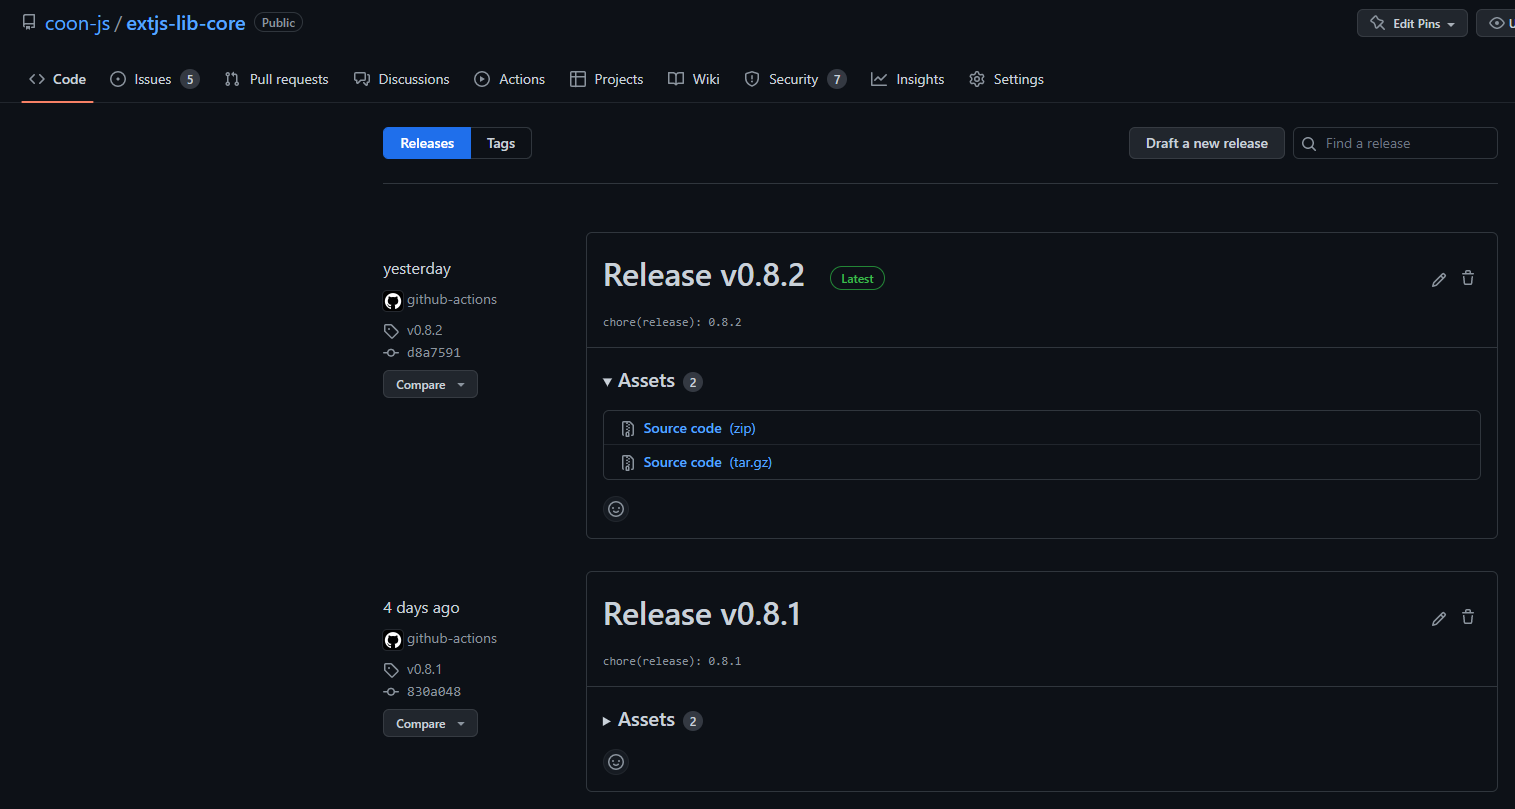
Adding the build as an asset to the Release
The build pipeline is almost ready to go — one last step is missing: The action to upload the previously created zipped build along with the release we’re just creating.
We have previously seen how to use actions/create-release- a predefined action from GitHub. We have also defined an id for this: id:create_release. This can now be used for querying properties published by the build step.
Again, GitHub provides the necessary action so we do not have to write it ourselves: actions/upload-release-asset is now used with a few additional configurations:
upload_url — the url to upload the asset to. This is the location of the release we have created with our create-release-step, and can be identified by ${{steps.create_release.outputs.upload_url}}
asset_path — the path to the asset we want to upload
asset_name — the name used for the asset. It’s a good practice to refer to the tag used with this release in its name: myproject.build.${{github.ref}}.zip
asset_content_type — the content-type of the asset. In our case, it will be application/zip
Here’s the build step in detail:
    - name: Upload assets
      uses: actions/upload-release-asset@v1
      env:
        GITHUB_TOKEN: ${{ secrets.GITHUB_TOKEN }}
      with:
        upload_url: ${{ steps.create_release.outputs.upload_url }}
        asset_path: ./release.zip
        asset_name: myproject.build.${{ github.ref }}.zip
        asset_content_type: application/zip
Note: We’re using the GITHUB_TOKENin this build step to make sure our read/write-operations succeed. The GITHUB_TOKEN is also used in the create-release build step.This token is an authentication token to make sure the build script and its actions may read from/write to a given repository. To learn more about this environment-secret, refer to its documentation.
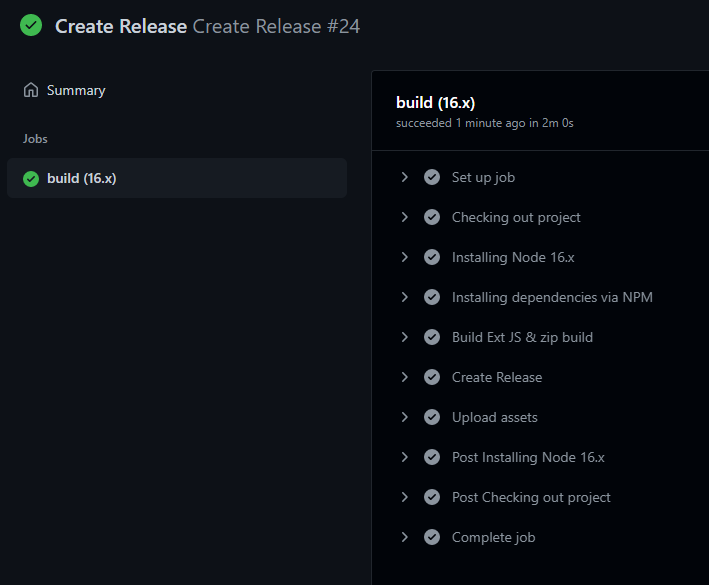
The Final Build Script
This is the final build script. If you want to use it in your project, make sure to adjust paths and names, as this script uses an environment defined within the conjoon-organization of GitHub.